Distribution lists are used to send e-mails to a group of people, without having to enter each e-mail address separately.
For example, create a distribution list for all members of your sales department where an e-mail is sent to sales@yourdomainname.com to all sellers.
Create a distribution list for your Basic mailbox
With a Basic mailbox you have two options.
- Set up a auto forward for your mailbox with multiple e-mail addresses
- Or alternatively set up multiple referral addresses
Create a distribution list for your Exchange mailbox
With an Exchange mailbox you first create a distribution list via the control panel. Then you add contacts / e-mail addresses to the list via your e-mail program (eg Outlook).
First follow these steps in the control panel:
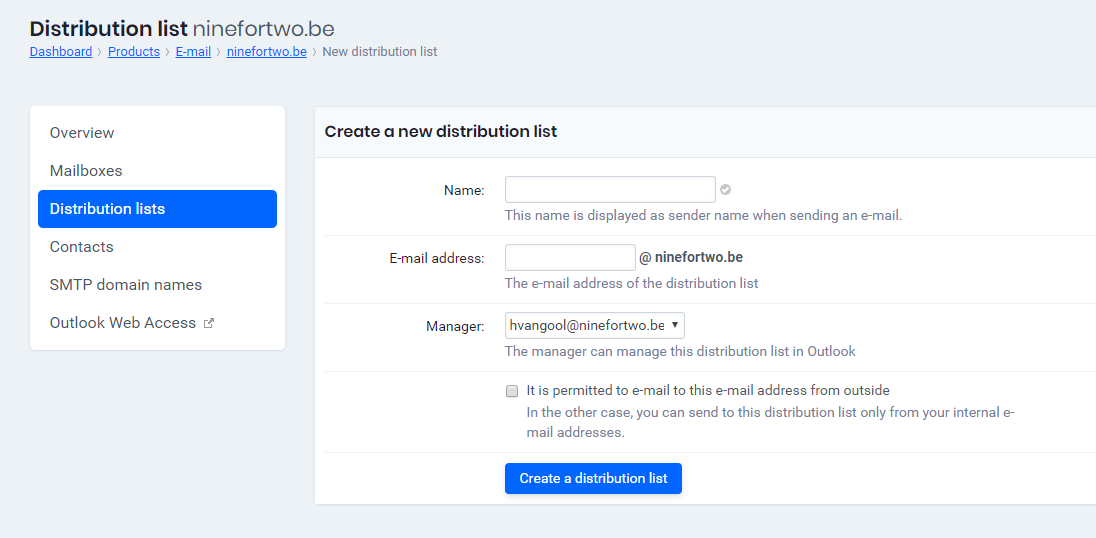
- Go to “My products”> “E-mail hosting”> Click on “Manage” next to the domain of your mailbox.
- Select “Distribution lists” in the menu on the left and click on “Add distribution list”.
- Choose a name, e-mail address and administrator for your distribution list.
- Click on “Create distribution list” to create the list and continue in Outlook to add contacts to your distribution list.
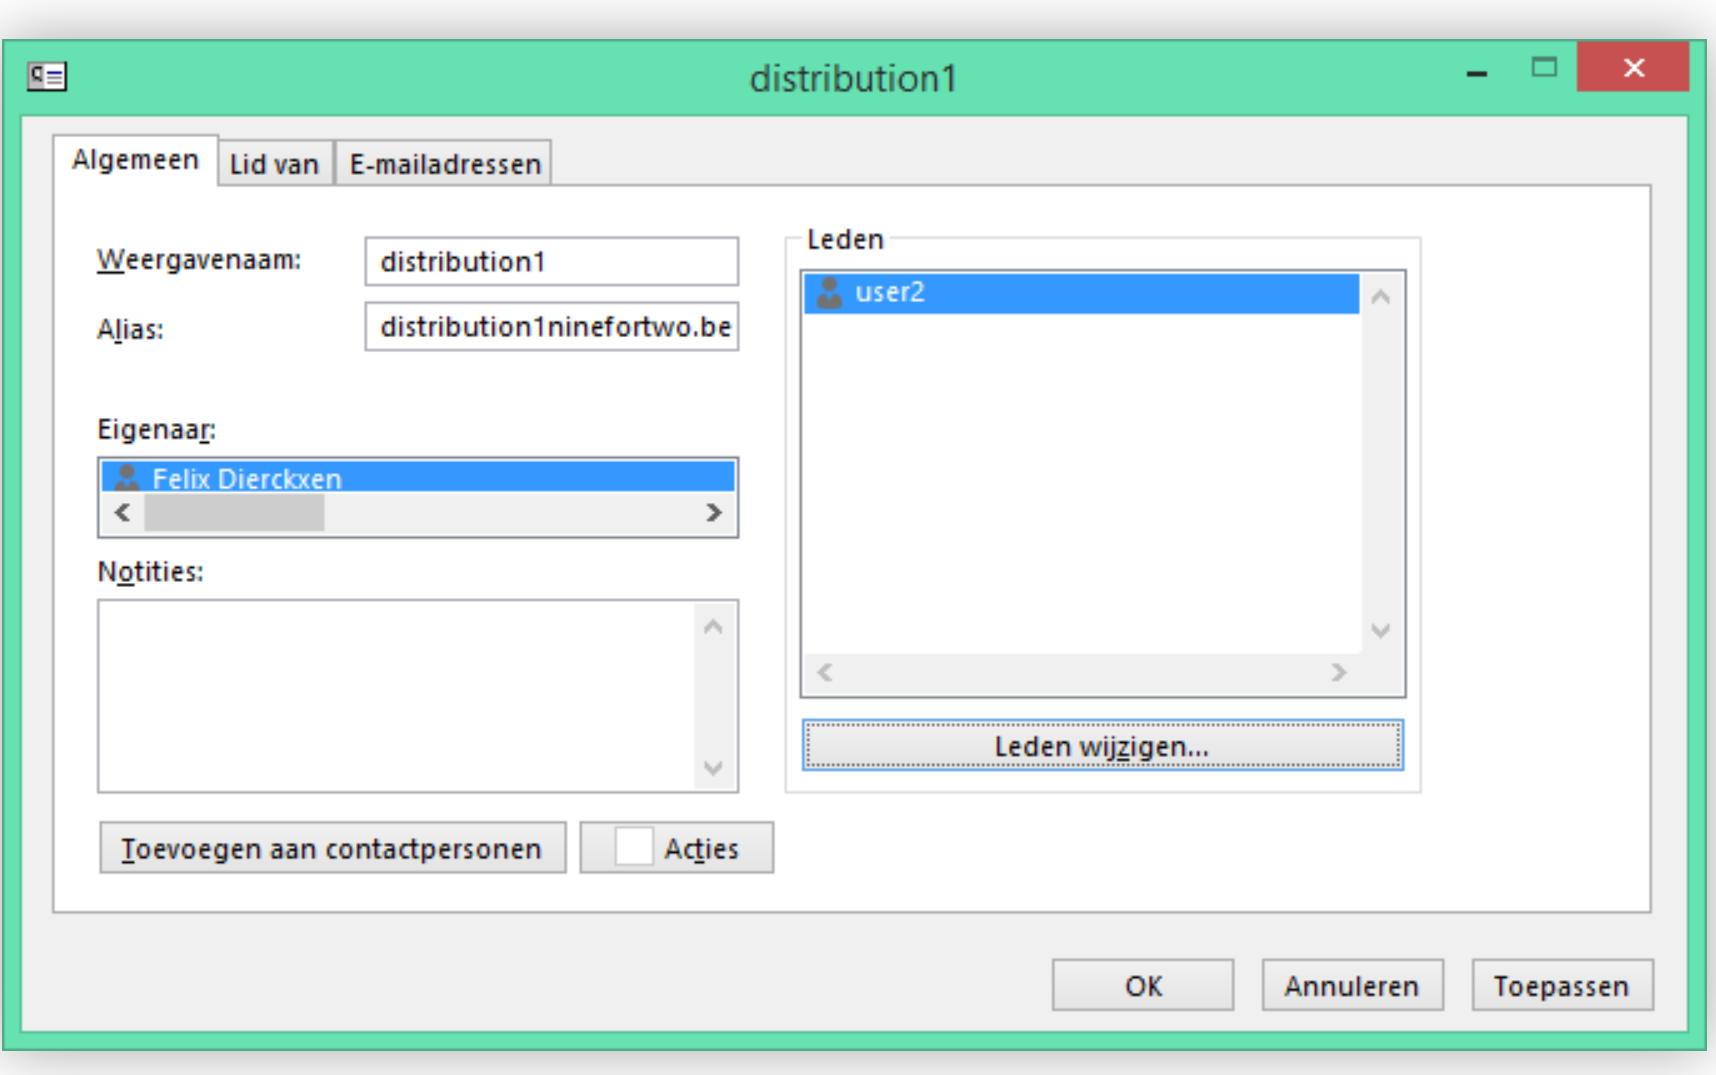
Then follow these steps in Outlook 2013 to add contacts to your distribution list:
- Open the address book (found in Outlook 2013 in the Start menu, at the bottom of the search bar).
- There you normally see a list of contacts and distribution lists. Click on the distribution list where you want to add e-mail addresses.
- Click on “Change members” to add contacts (e-mail addresses).
- Ready? Click “OK” and then “Add” to confirm.