An auto forward is useful when you want all your e-mails to arrive at just one e-mail address. Do you rarely receive e-mail at a specific address? Then it is easier to forward the e-mails from that mailbox to your general e-mail address.
The way in which you set up an auto forward depends on the type of mailbox. Choose your type of mailbox and follow the manual.
Also read: Create a referral e-mail address without a mailbox
Add an auto forward to your Basic mailbox
With a Basic mailbox you add an auto forward via the control panel or the webmail.
- Control panel
- Webmail
Follow these steps in our control panel:
1. Go to “My products”> “E-mail hosting”> Click on “Manage e-mail” next to the domain of your mailbox.
2. Select “Mailboxes” in the menu on the left and click on “Manage” next to the desired mailbox.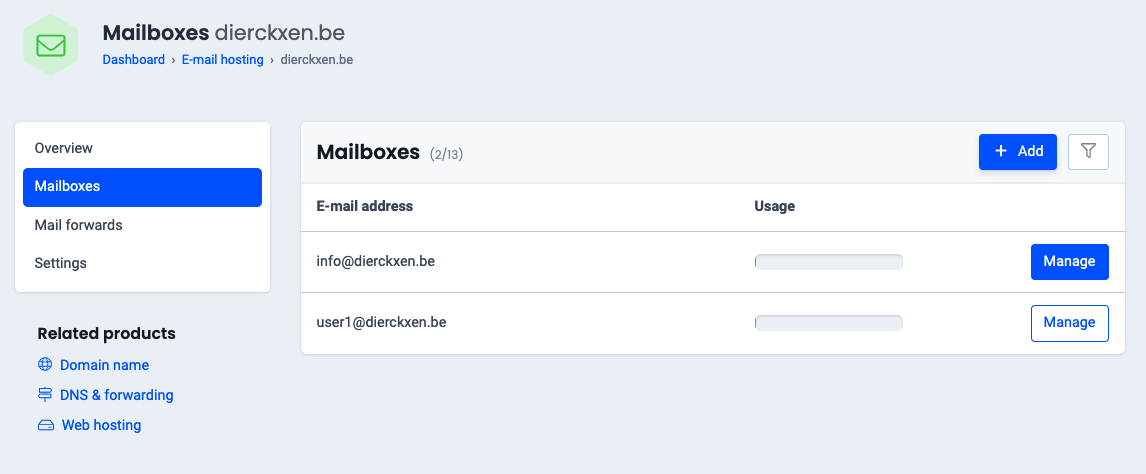
3. Scroll down and click on “Activate automatic forwarding”.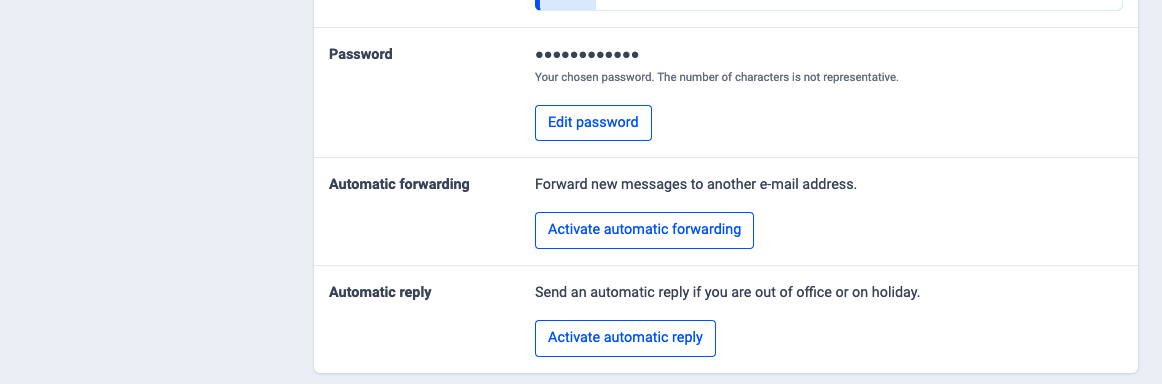
4. Fill in the e-mail address to which you want to sent the e-mails.
Do you also want to keep the e-mails in the original mailbox? Check the “Copy to myself” option.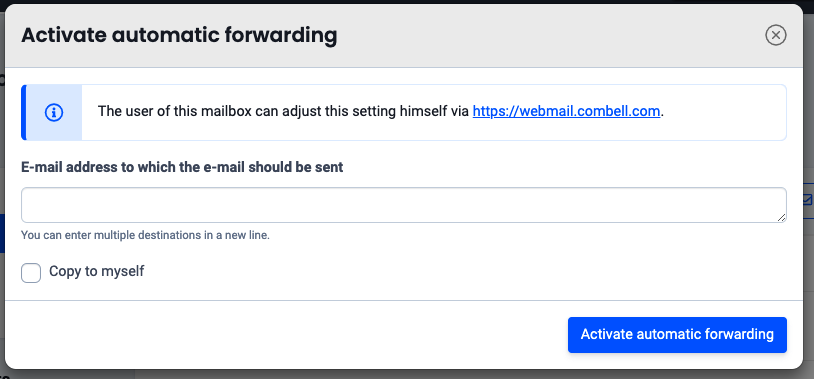
5. Click on “Activate automatic forwarding” to confirm.
Follow these steps in Webmail:
1. Go to “Settings” and click on “Forwarder”.
2. Set the radio button to “Forward messages”.
3. Enter the e-mail address to which the copies should be sent.
4.Do you also want to keep the e-mails in the original mailbox? Check “Send a copy to myself”.
5. Save.
Add an auto forward to your Exchange mailbox
Follow these steps in the Outlook Web App:
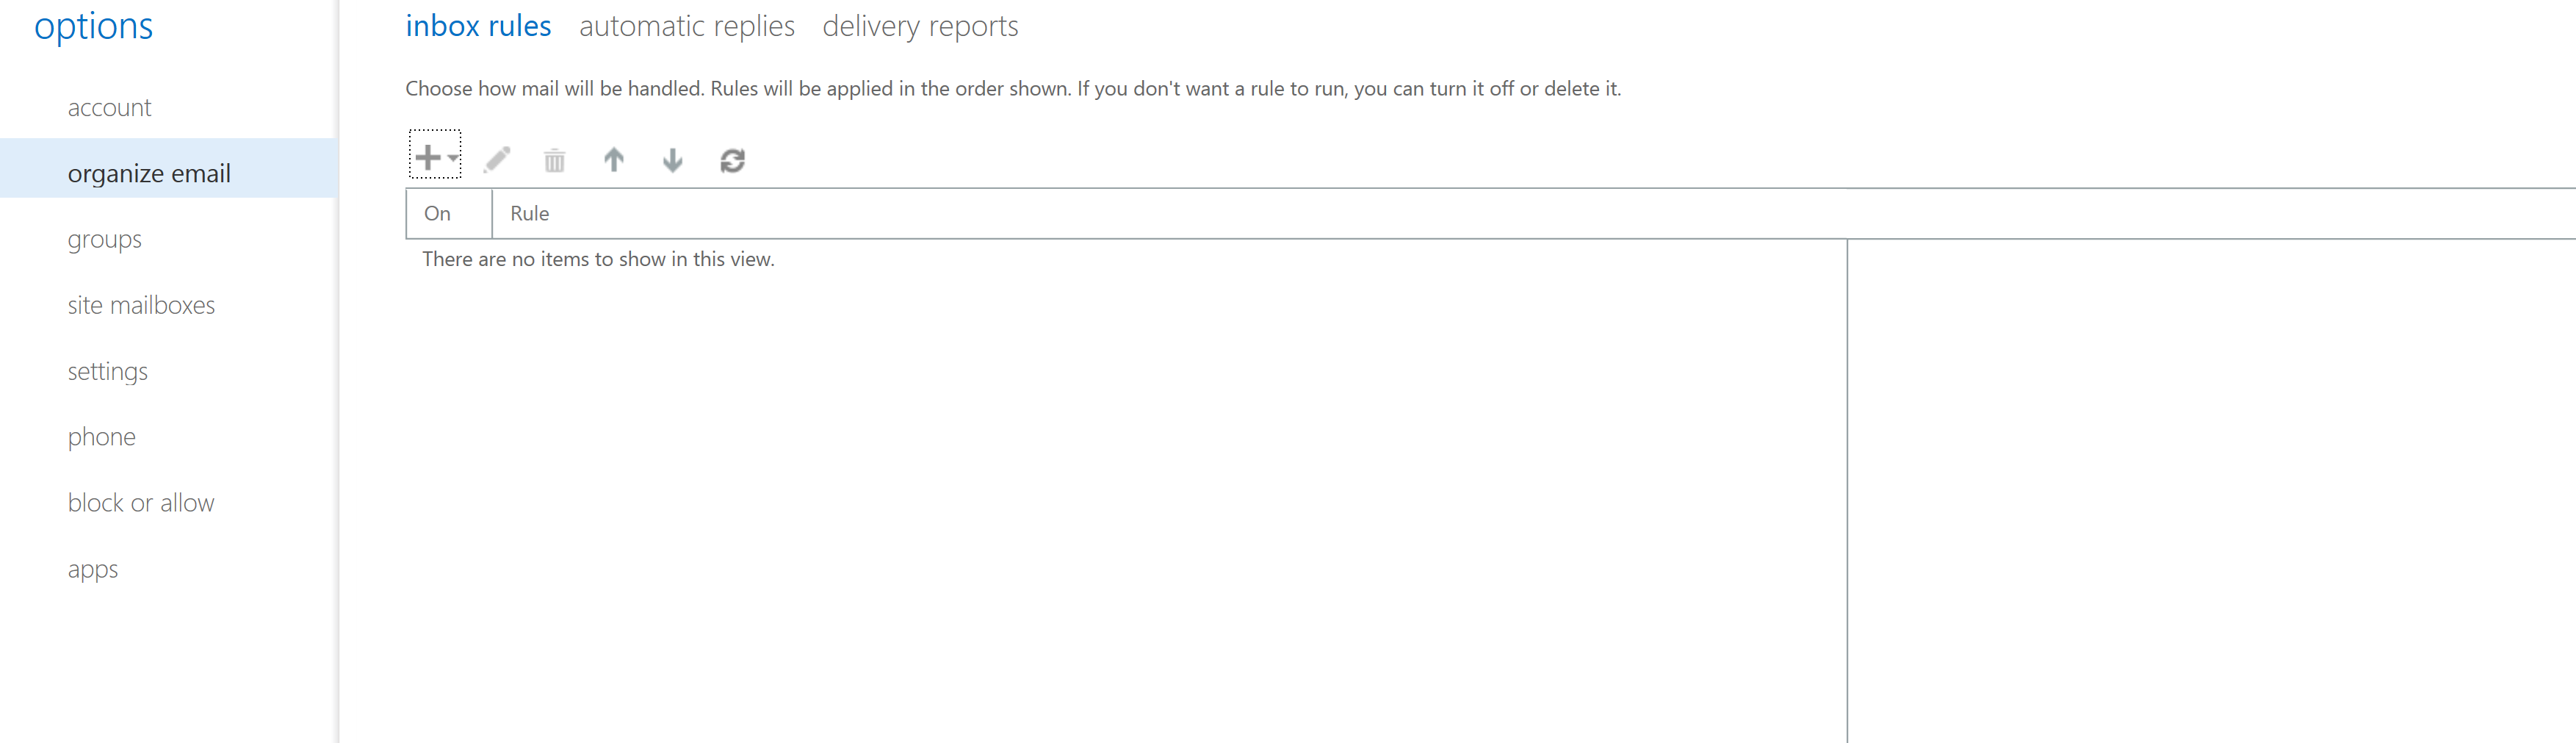
- Click in the top right on “Options” and choose “Create inbox rule”.
- Click on “New” (see image)
 Optional:
 - Do you also want to keep the e-mails in the original mailbox? Click on “More options”.
- Click on “Add action”
- In the “Select an action” drop-down menu, go to “Move, Copy or delete”> “Copy the message to folder …”.
- Select your inbox “Inbox” and confirm.
- Save.

