Once your Basic mailbox has been created, go to Outlook on your Windows computer to set up your mailbox.
Doubt about your version? Quickly check which Outlook version you use Outlook on an Apple computer? Use our manual for Outlook on Mac
Set up your mailbox with Outlook
Follow these steps in Outlook on your Windows computer
- Click on “File” in the top left corner and click on “Add account”

- Enter your e-mail address and check the option to set up your account manually in the advanced options

- Now choose “IMAP”
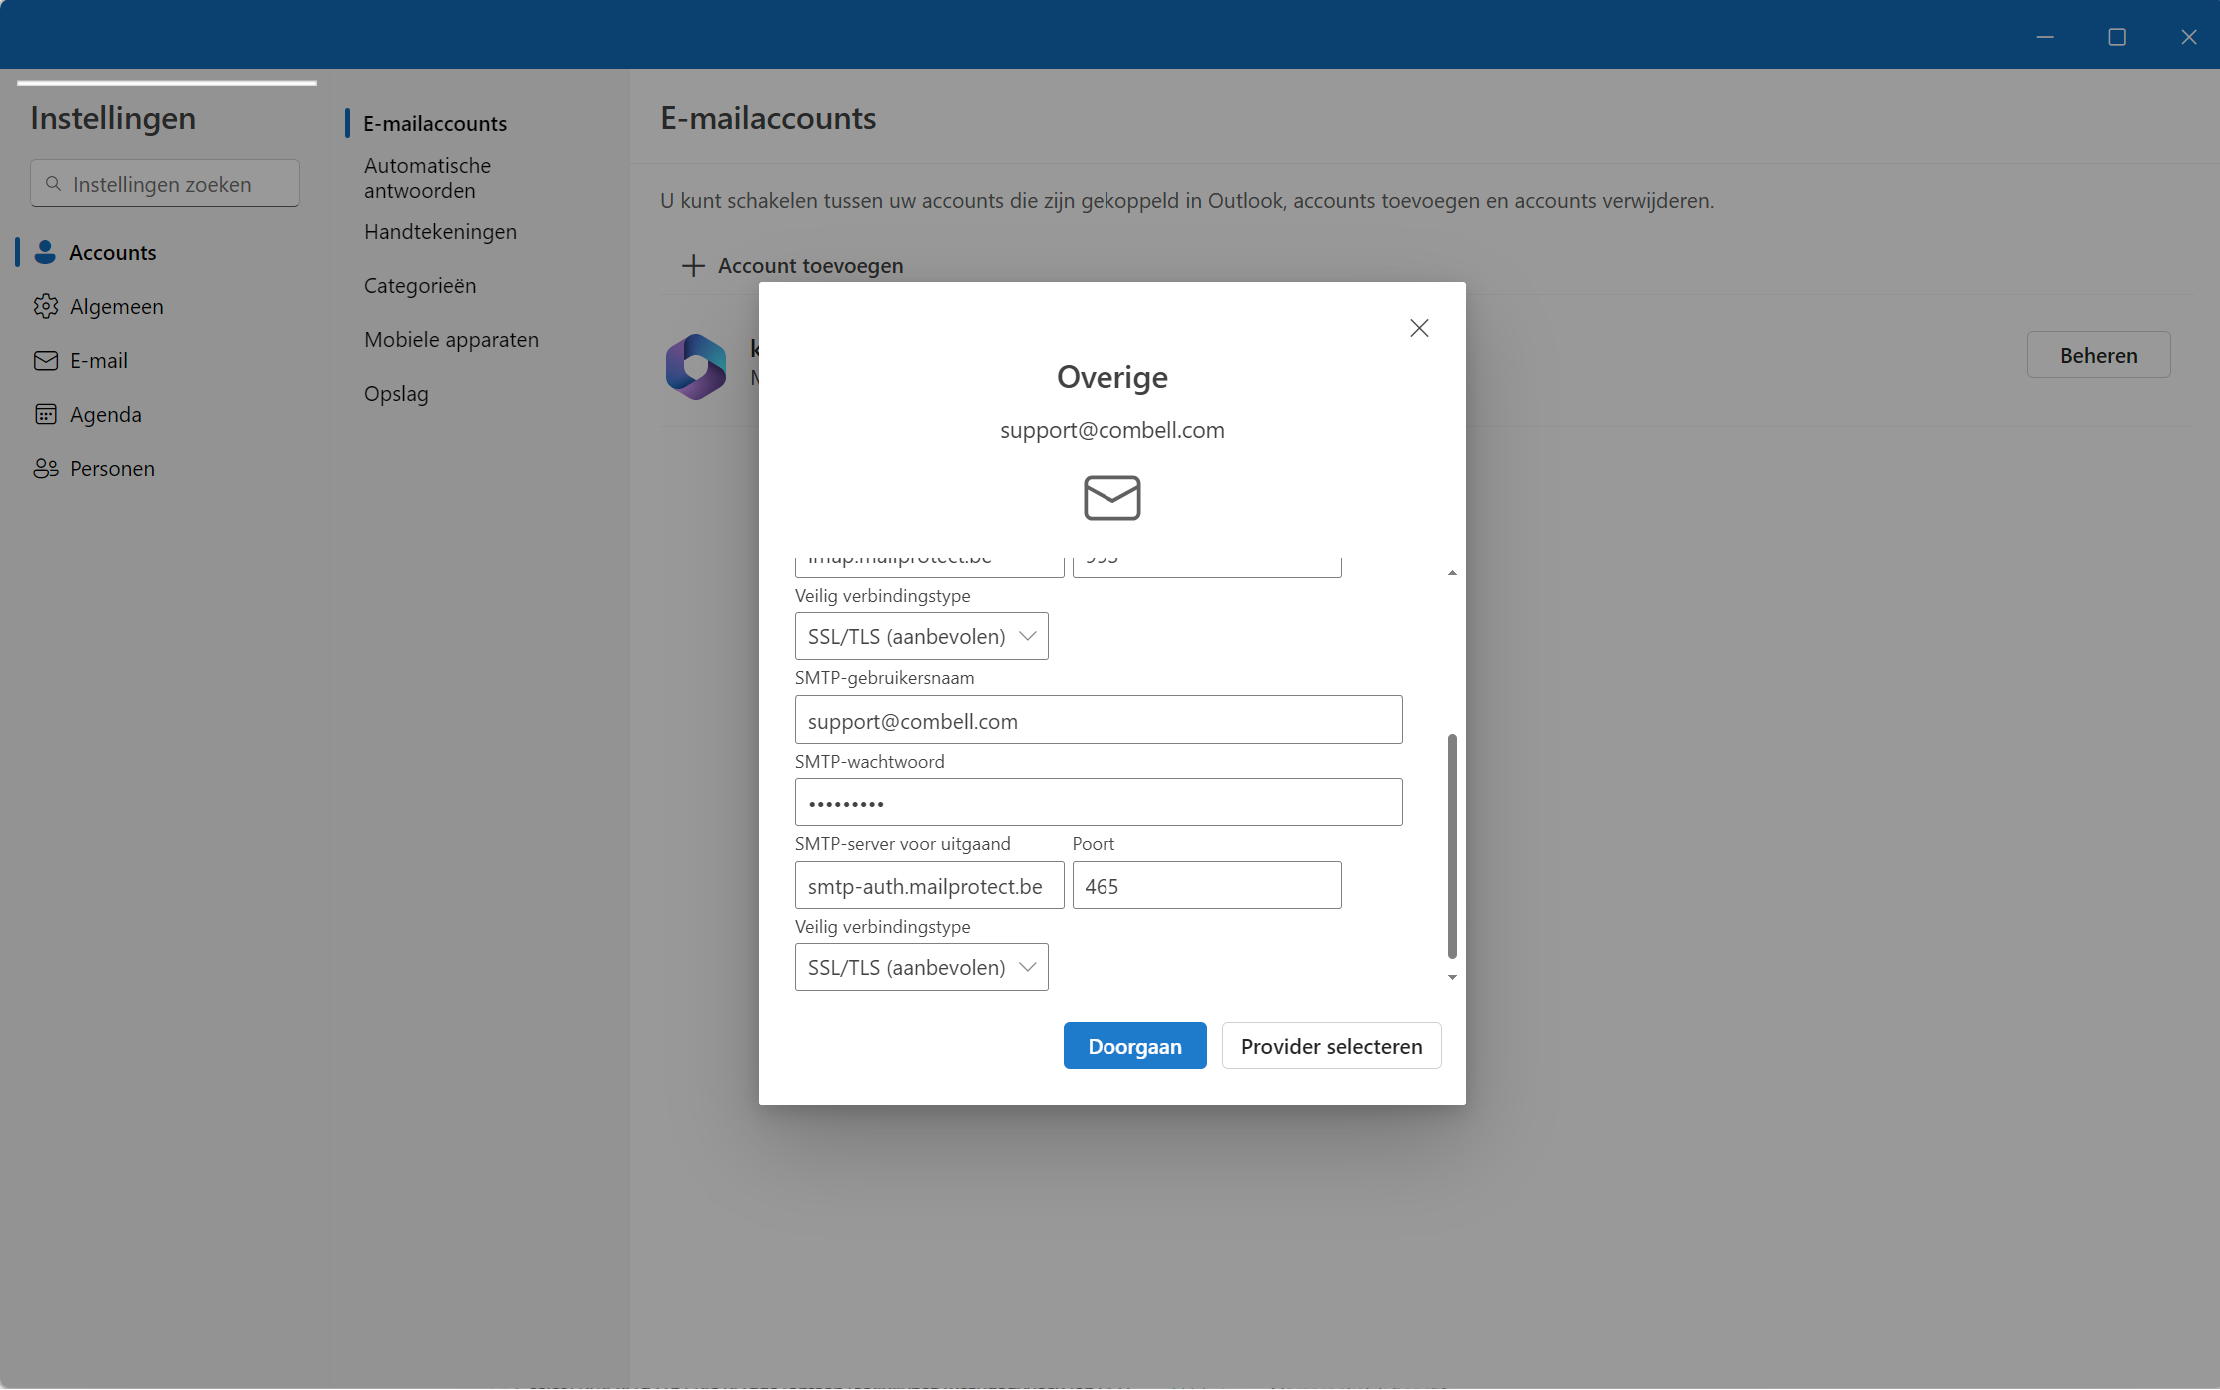
- Enter the following information
- Incoming server: imap.mailprotect.be – port 993
Secure connection type: SSL/TLS - Outgoing server: smtp-auth.mailprotect.be – port 465
Secure connection type: SSL/TLS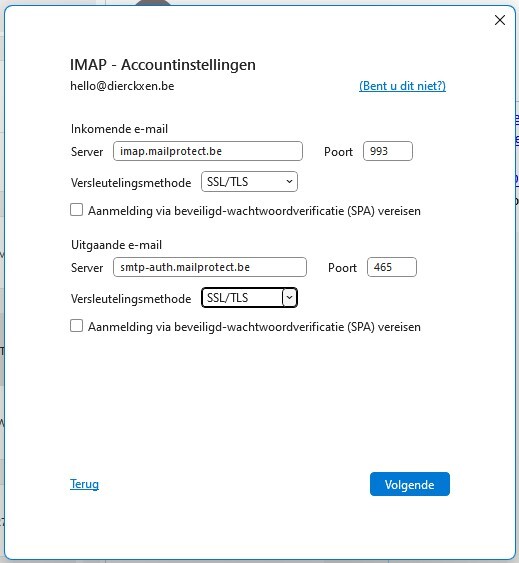
- Incoming server: imap.mailprotect.be – port 993
- Fill in your password and continue. Your account is now added to Outlook.
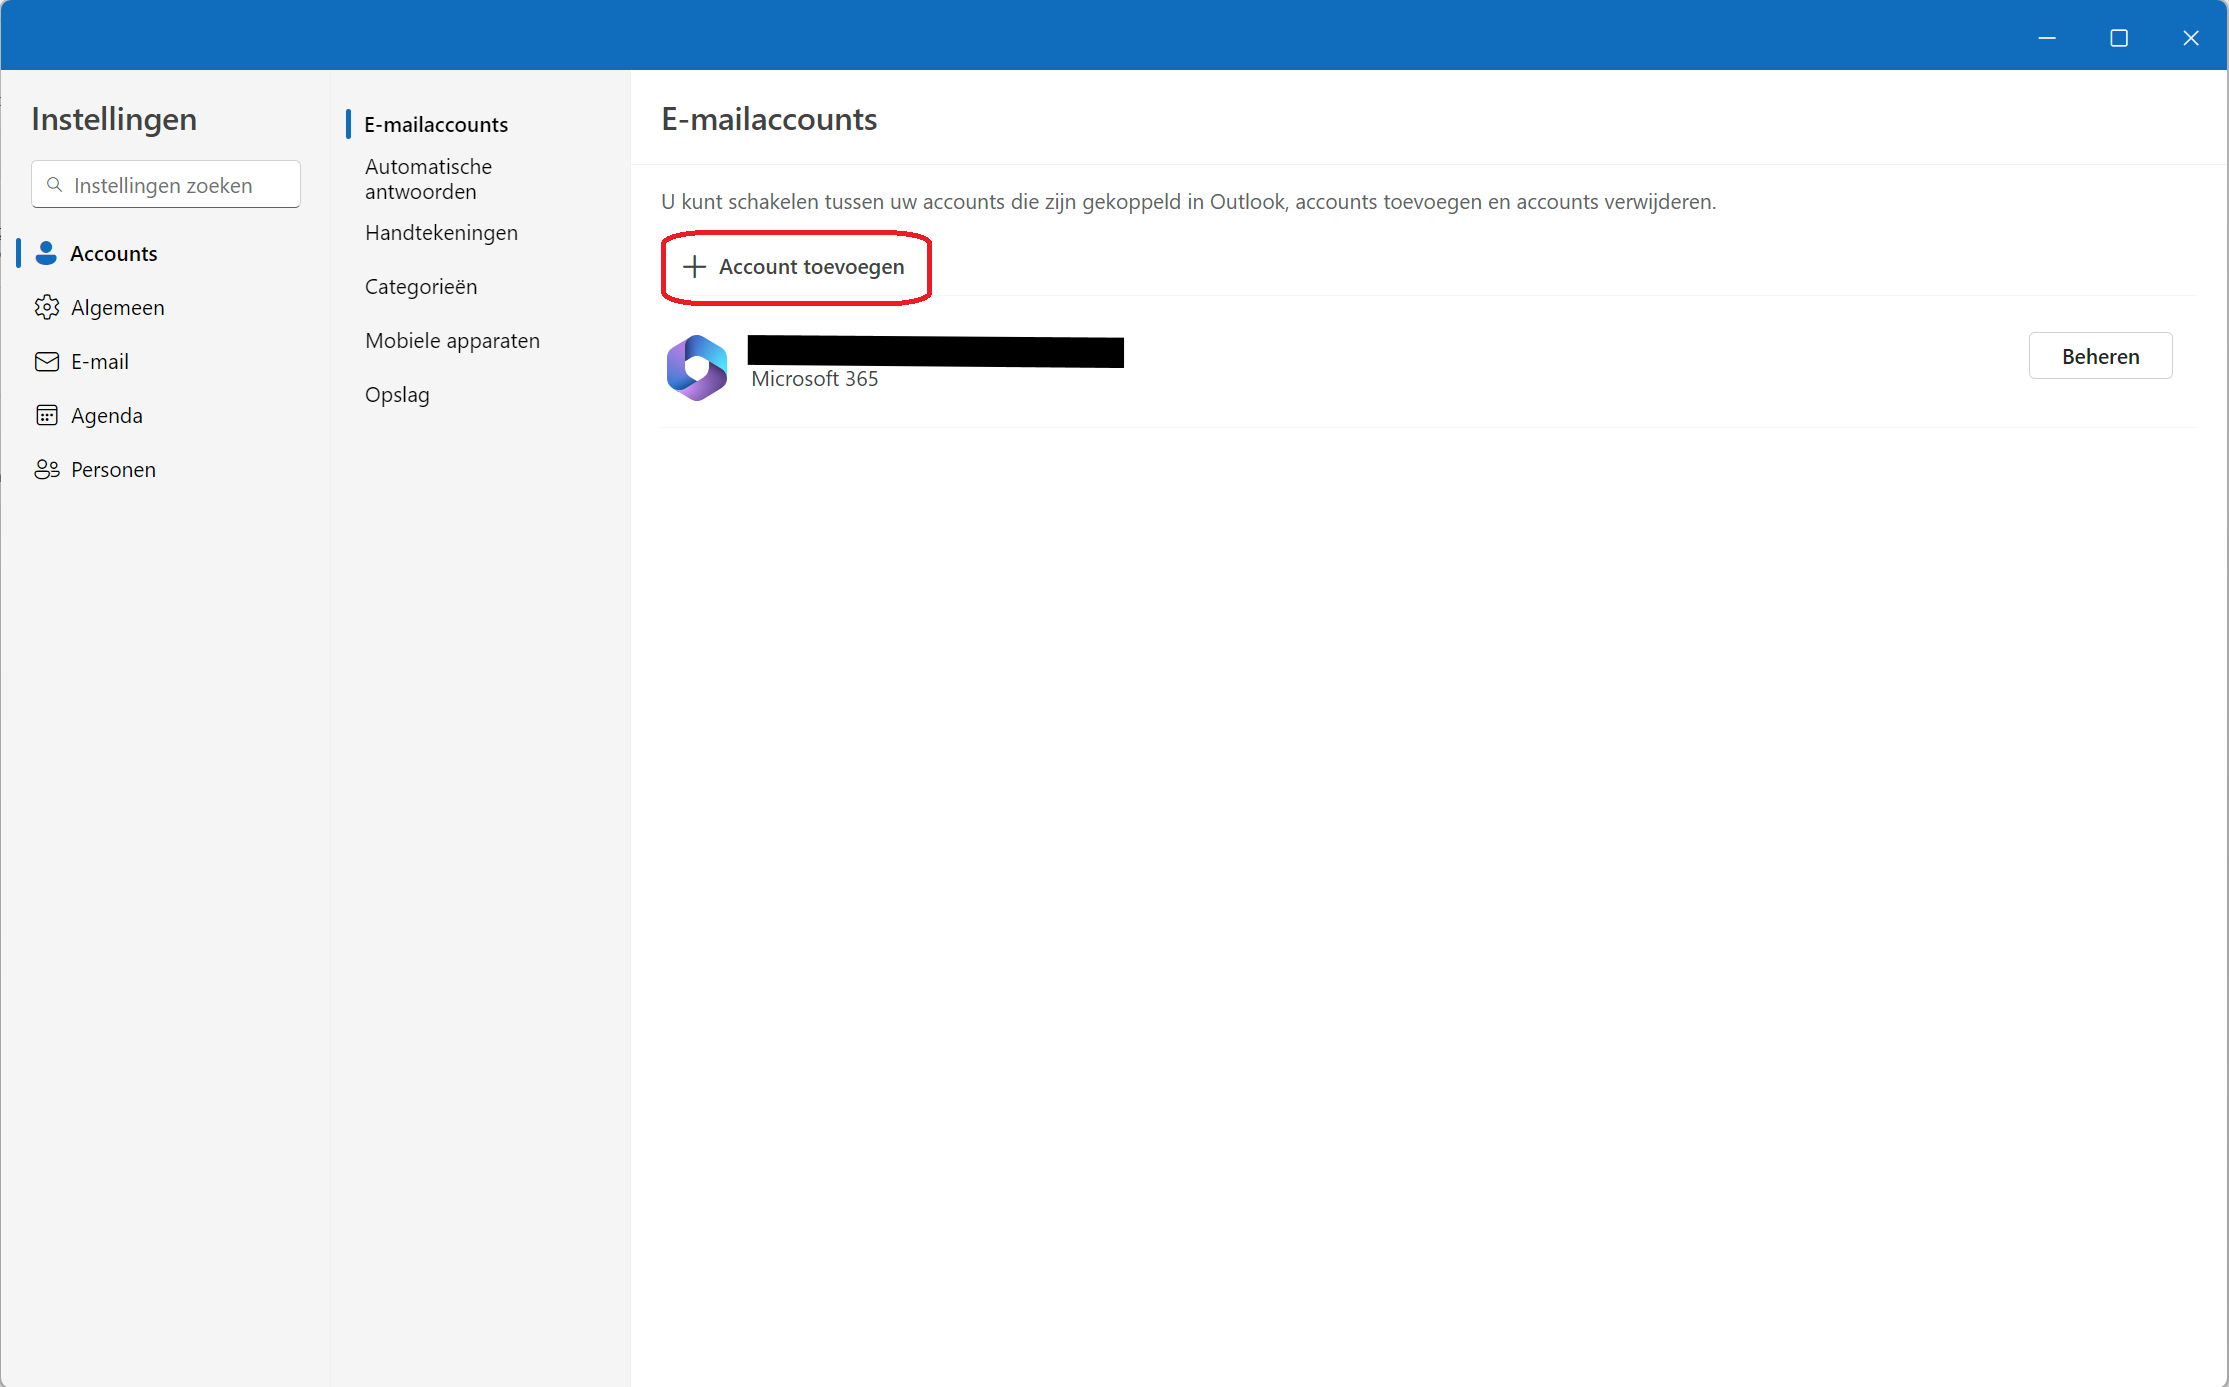
Set up your mailbox with Outlook (new)
Follow these steps in Outlook (new) on your Windows computer.
- Click on the gear icon at the top right
- You are now in “Accounts”. Click here on “Add account”.
- Now choose “IMAP”
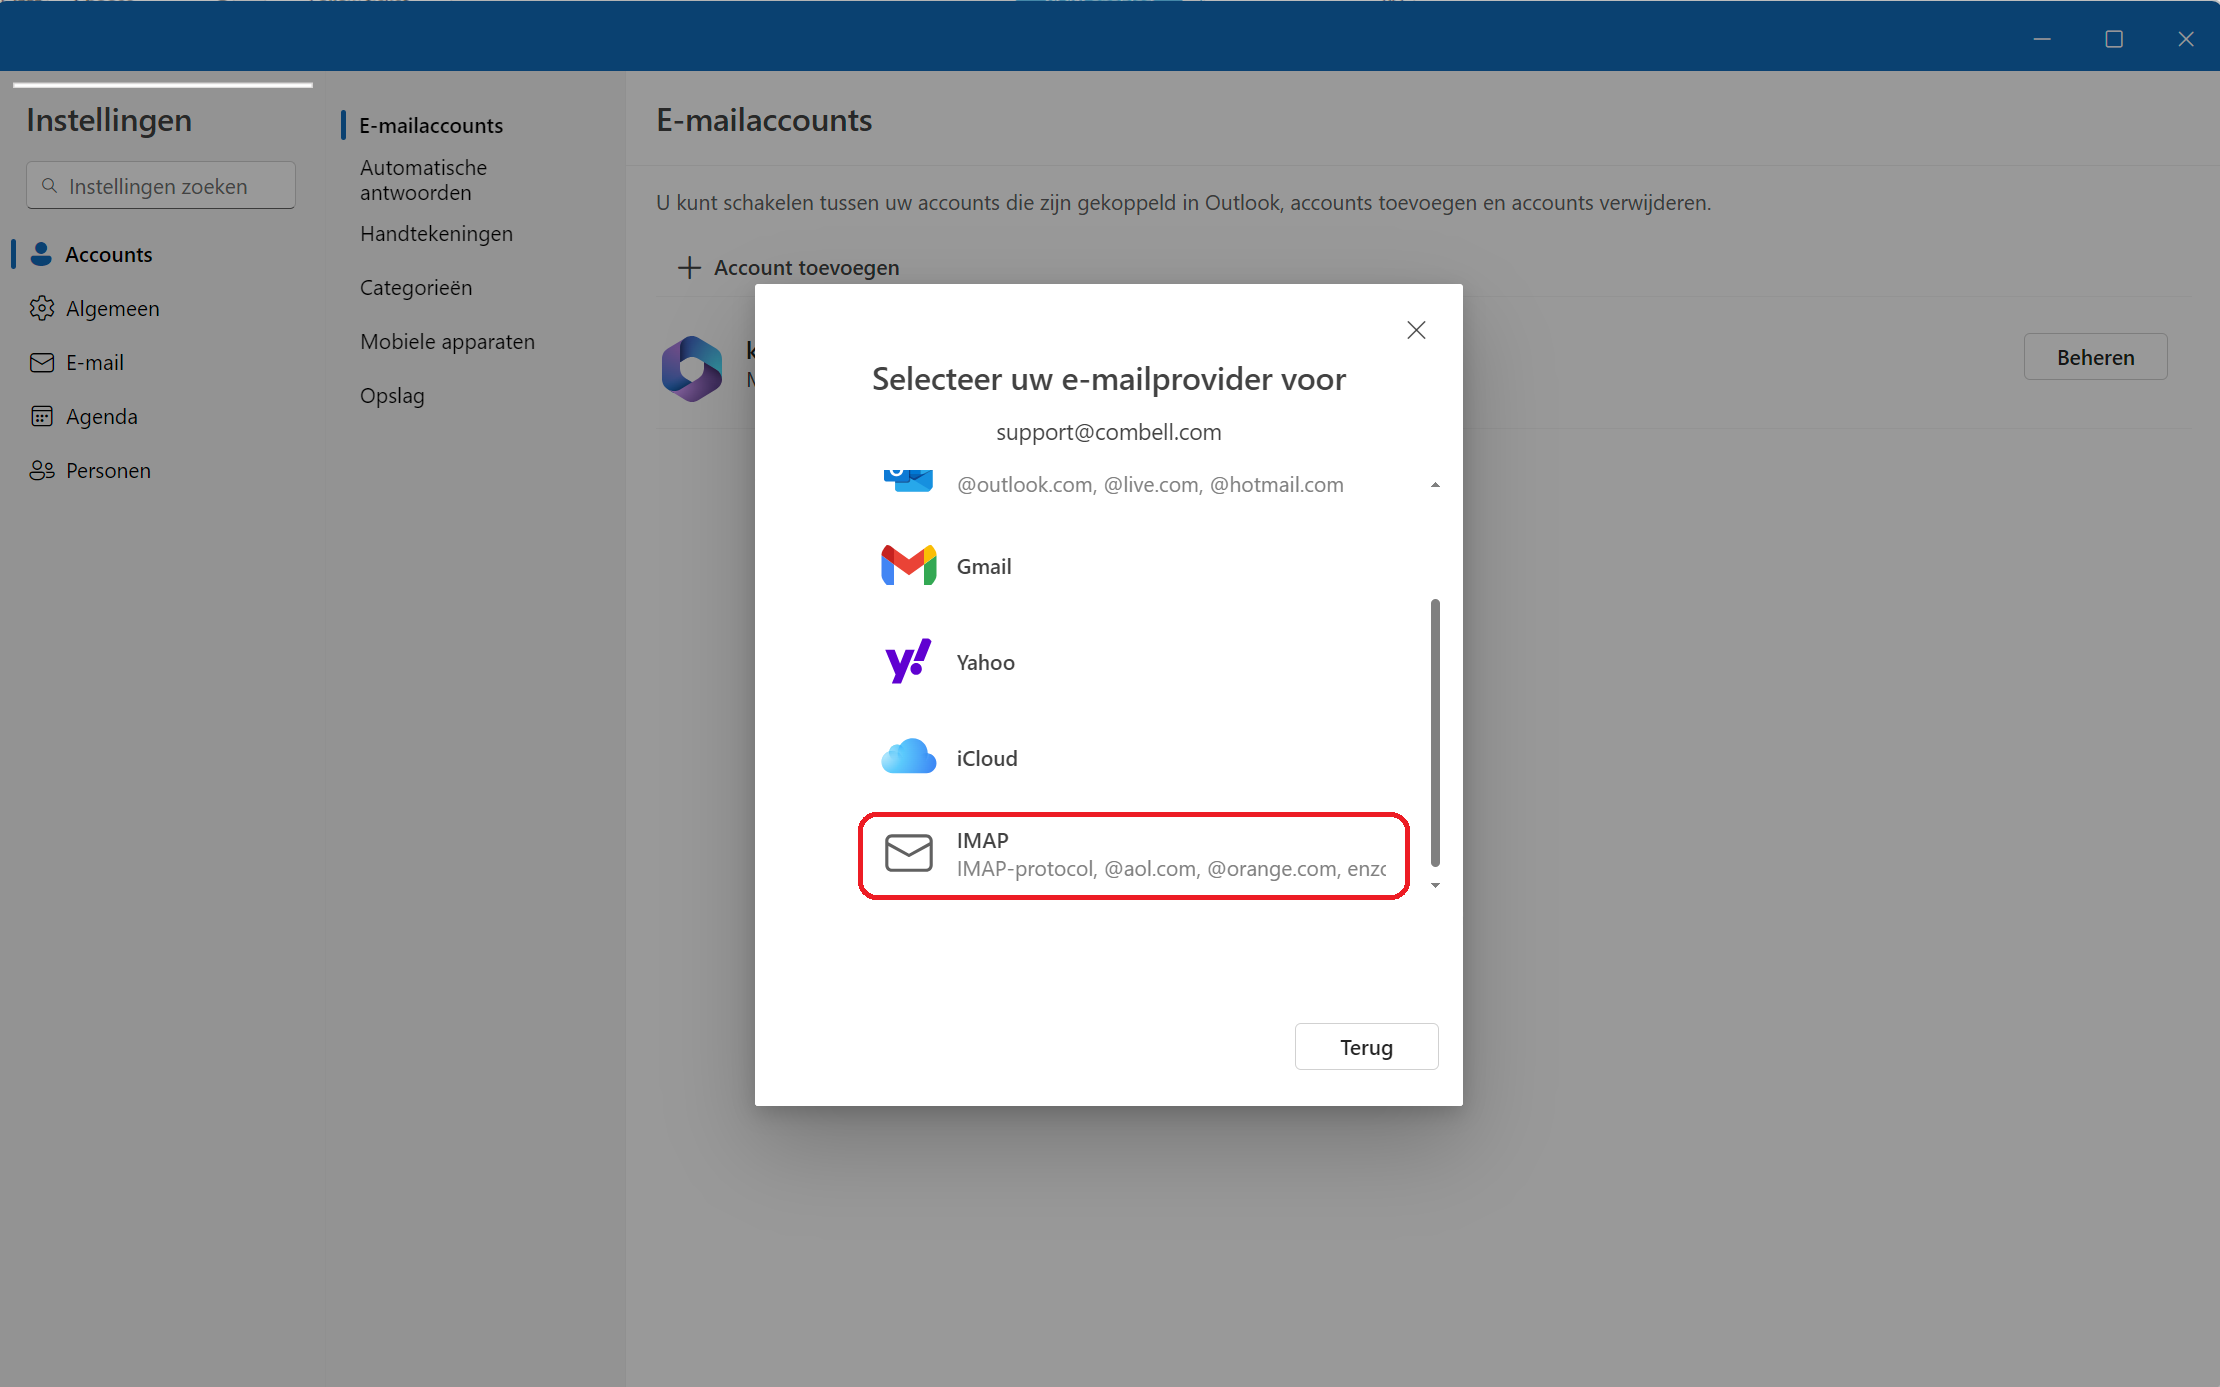
- You will see a login screen. Enter your email address that you want to set up here and continue.
- If the automatic setup fails, click “Advanced installation”.
- Enter the following information
IMAP password: password of your mailbox
IMAP server for incoming: imap.mailprotect.be port 993
Secure connection type: SSL/TLS
SMTP username: your email address
SMTP server for outgoing: smtp-auth.mailprotect.be port 465
Secure connection type: SSL/TLS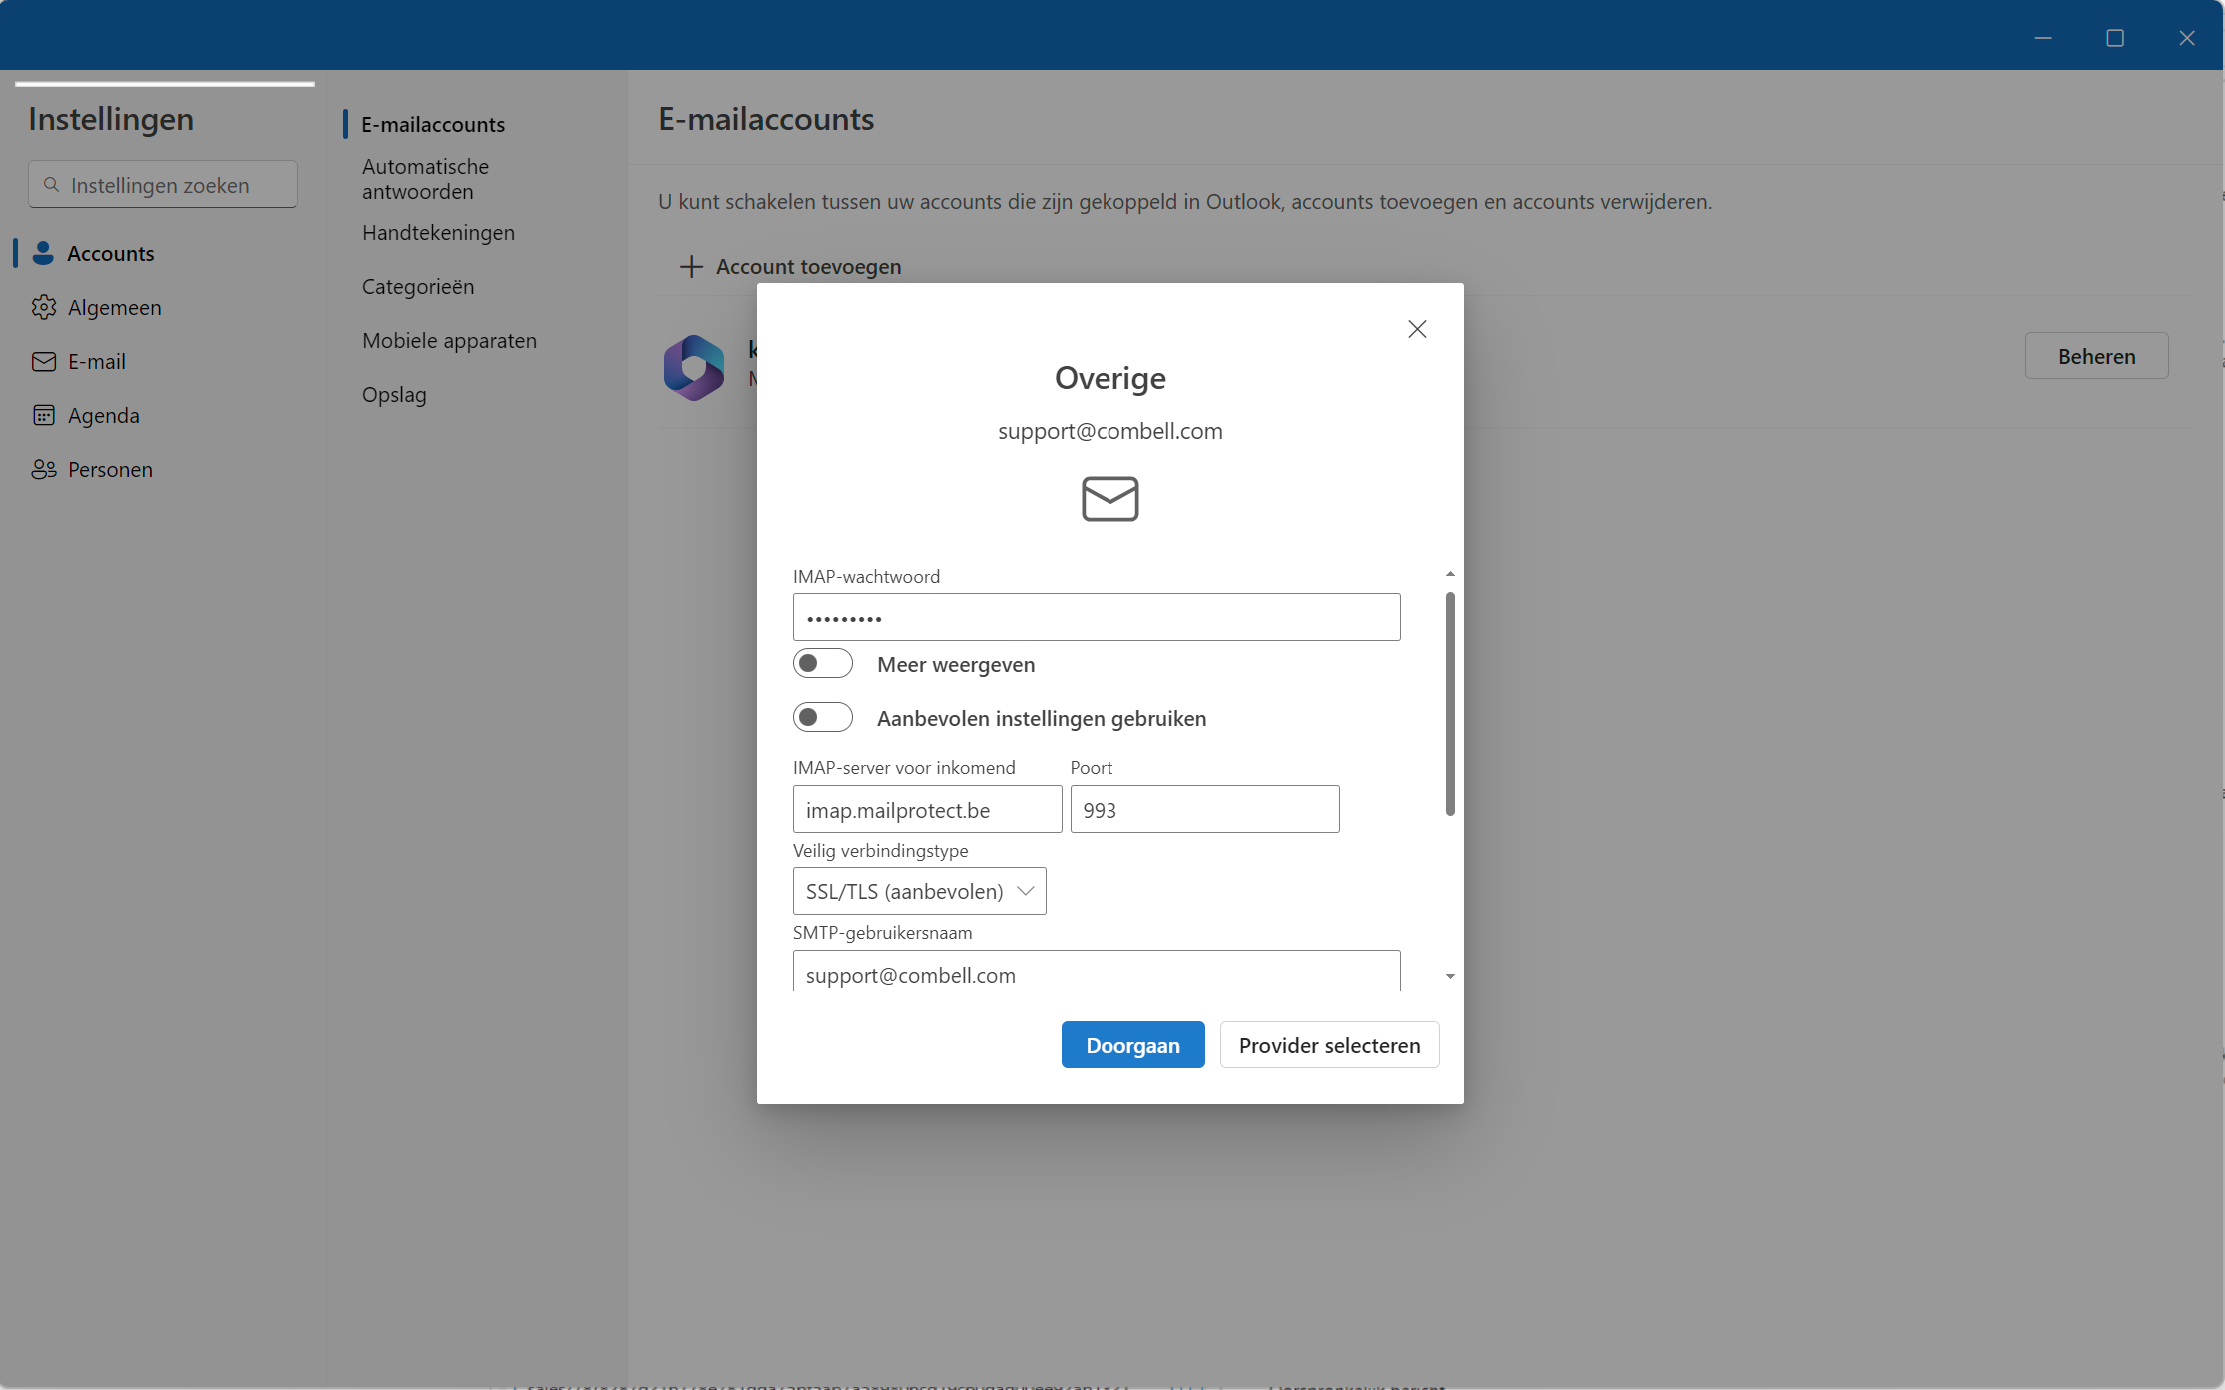
- Then click “Continue” to set up the mailbox.
Set up your mailbox with Outlook 2019
Follow these steps on your Windows computer
To install your Basic mailbox on Outlook 2019 from Microsoft 365 (formerly Office 365), first close the Outlook app completely!
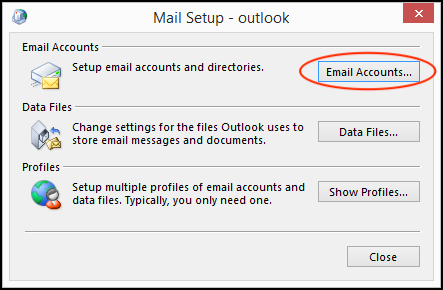
- Go to the Windows Control Panel
Use the Windows search function to get there - Click on “Mail (Microsoft Outlook)”
This item is only visible if you choose the view with large or small icons at the top right, not the category view (see image).
- If you have not created a profile before, you will get the screen below (see image) where you have to click on “Add”.
Choose a name for your profile and confirm. Click “Apply” to continue. That is not what you see? Then you have already created a profile and the configuration is slightly different, see below.
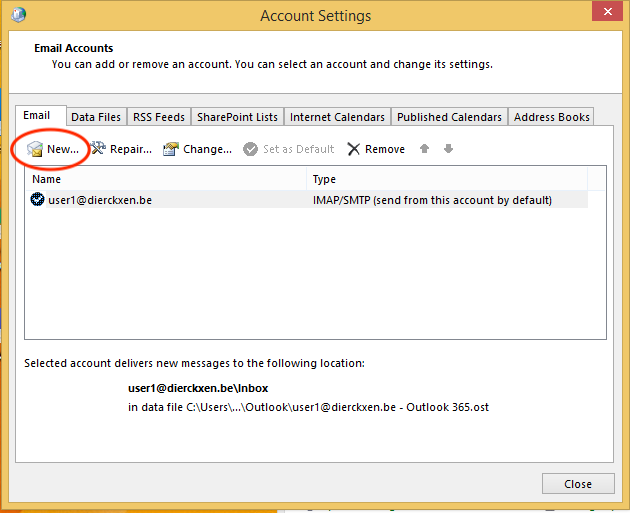
Click on “New” and choose “E-mail accounts” and continue.
4.Enter the details of your mailbox: Your Name: Fill in your name (to appear in your email) Email Address: Fill in your email address Password: Fill in your password and repeat
Click on “Next” to continue. Outlook will try to configure your mailbox automatically.
Automatic configuration not successful? Then you have to complete the configuration manually.
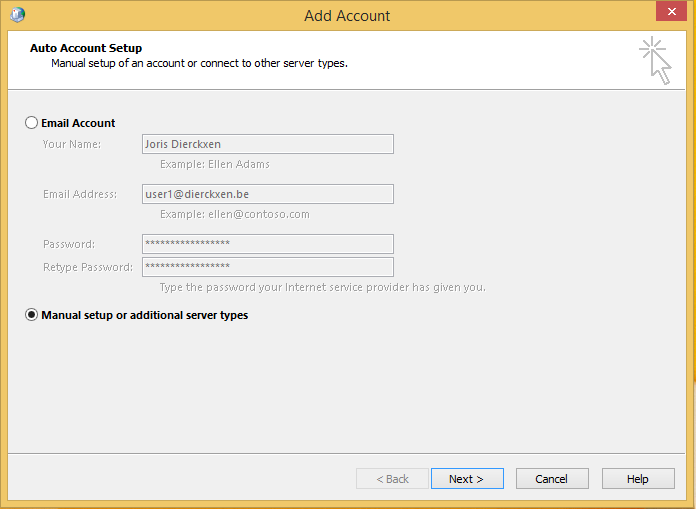
Choose “POP or IMAP” and click “Next”
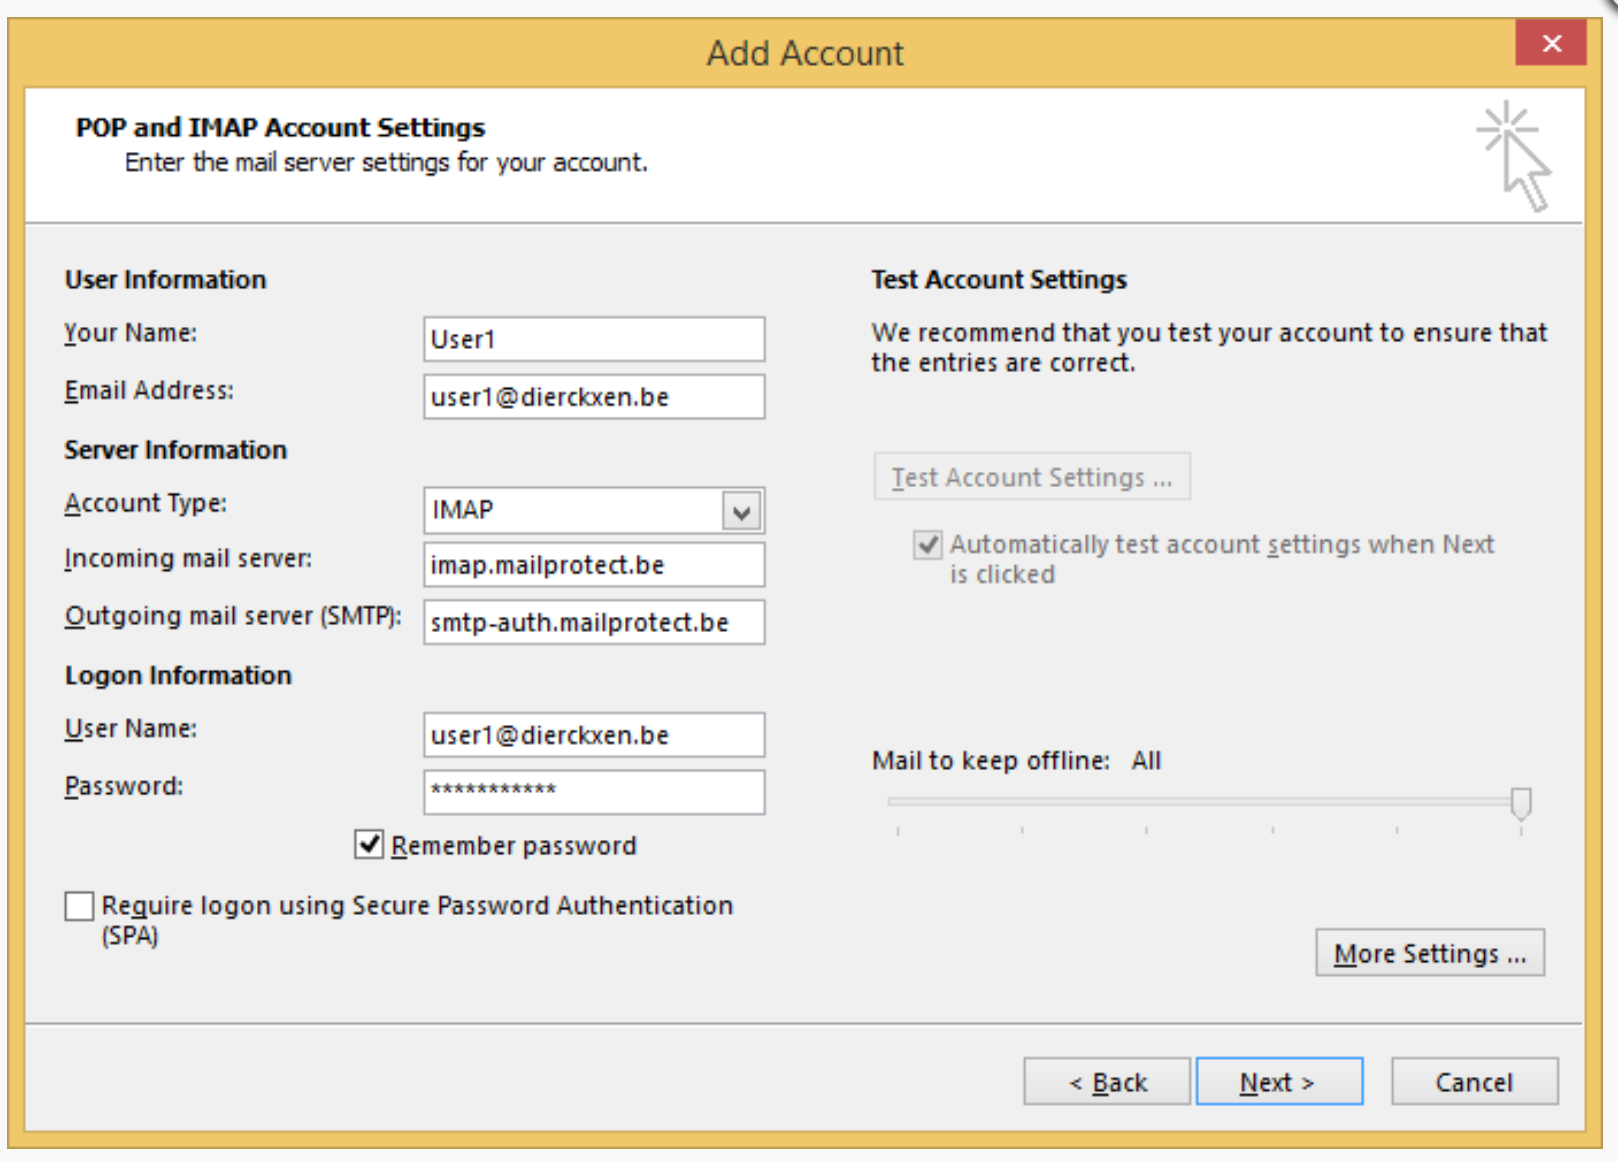
Fill in the missing data of your mailbox Your name: Fill in your name (to appear in your e-mails) Email address: Fill in your email address Choose between IMAP or POP in the dropdown menu (read our guide to help your choice) Incoming mail server For IMAP (recommended): imap.mailprotect.be For POP: pop3.mailprotect.be Outgoing mail server smtp-auth.mailprotect.be Username: Fill in your username Password: Fill in your password

Click on “More Settings”
Go to the “Outgoing server” tab and check “My outgoing server (SMTP) requires authentication”.
Go to the “Advanced Settings” tab and adjust the default ports to our secure ports: Incoming mail server: Fill in port 995 (for POP) or port 993 (for IMAP) Outgoing mail server: Fill in port 465
Make sure “SSL/TLS” is selected for both servers as encryption type in the “Advanced” tab:
Enter port 995 (for POP) or port 993 (for IMAP)
Click on “Next” to complete the configuration of your mailbox
Set up your mailbox with Outlook 2013/2016
Follow these steps in Outlook 2013 or 2016:
- Via the navigation bar at the top left you go to “File”> “Add account”.
- At the bottom choose the option “Manual setting or additional server types” and continue.
- Choose “POP or IMAP” and continue.
- Choose IMAP or POP3 in the drop-down menu ( read our selection guide ) and enter the missing information (see image).Name: Enter your name (appears with your e-mails) E-mail address: Enter your e-mail address Incoming e-mail server: For IMAP (recommended): imap.mailprotect.be For POP3: pop3.mailprotect.be Outgoing e-mail server: smtp-auth.mailprotect.be Username: Enter your email address Password: Enter your password
- Before you click on “next”, click on “More settings” at the bottom right.
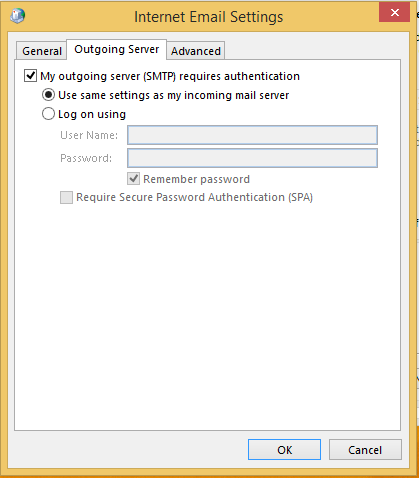
- Go to the “Outgoing server” tab and check the option “My outgoing e-mail server (SMTP) requires verification”. Select the option: “Use the same settings as for my incoming e-mail” and click “OK”.

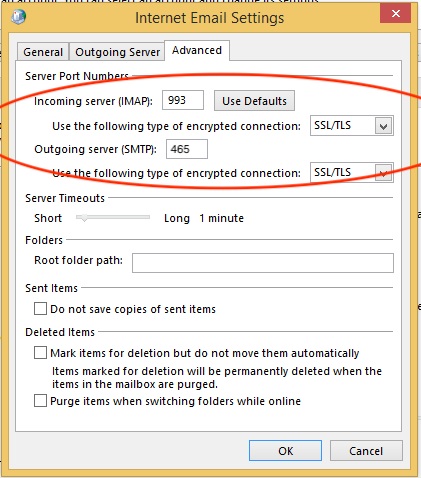
- Go to the “advanced” tab (see image) and make sure the ports match this data:
- For incoming servers this is 995 (pop) or 993 (imap)
- For the outgoing server 465
- Click on “Next” and Outlook will check your settings and send a test message. As soon as that check is over, your mailbox is active and you can close the configuration.

