Follow these steps in Windows 10
- Open the standard Windows 10 mail program.
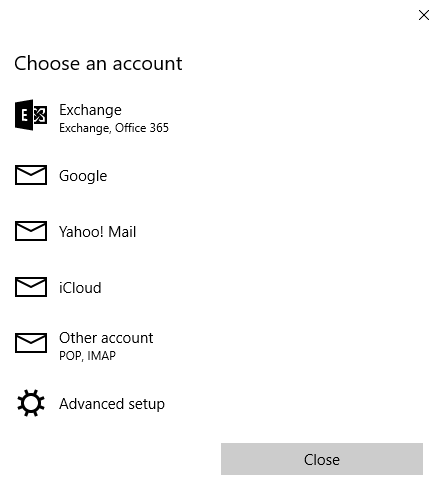
- If this is the first account that you set up, click on “+ Add Account” in the welcome window.
- If you already have other accounts and the welcome window has not appeared, click on the gear at the bottom left. The “Settings” menu appears from the right-hand side of the screen. Click on “Manage Accounts” and you will see the “+ Add Account” button.
- Select “Exchange” from the list of options.
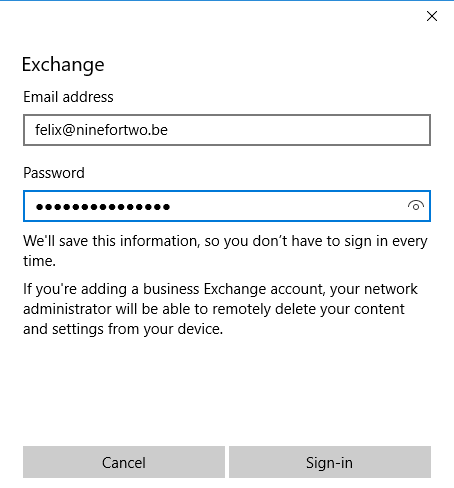
 Enter your full e-mail address in “Email address” and click on “Next”.
- Then enter your password in “Password”.
- Click on “Sign-in”.
- You’re done. Wait a while for your e-mail settings to synchronize.
Follow these steps in Windows 8
- Open your Windows 8 Mail app. It will open in full screen. Log in with your Microsoft account.
- Move your cursor to the right edge or the bottom right corner of the screen to display the charms bar.
- Click on “Settings”> “Accounts”> “Add account”> “Exchange”.
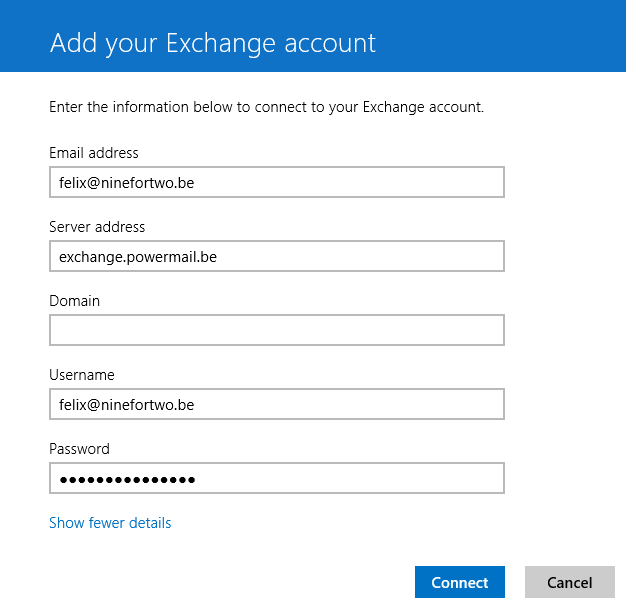
- Click on “Show more details”.

 Enter your e-mail address at “Email address”.
- At “Server address” you enter: exchange.powermail.be
- At “Domain” you enter: hmc
- At “Username” you enter your e-mail address again
- Enter your password
- Click on “Connect”
If you now receive a security warning, make your computer obligatory to accept the stricter security policy.

