Transferring a website from your computer to your web hosting is very easy with FTP.
IN THIS ARTICLE
- Step 1: install an FTP program
- Step 2: Search for your FTP data in the control panel
- Step 3: Connect to your hosting package via FTP
- Step 4: Transfer your files via FTP
Step 1: Install an FTP program
To put your website on your hosting package via FTP you must install an FTP program. We use the free FileZilla ftp client for this manual, but there are many other options available.
Some popular FTP programs:
- For Windows: FileZilla (recommended), SmartFTP, CuteFTP, WS_FTP
- For Mac: FileZilla (recommended), CuteFTP, Transmit, Fetch, gFTP
- For Linux: FileZilla (recommended)
Step 2: Search for your FTP data in the control panel
To connect to your web hosting with your FTP program, you need login information from your FTP account.
Follow these steps in the control panel :
- Go to “My products”> “Web hosting”> Click on “Managed hosting” next to the the domain for which you want to consult the hosting.
- In the menu on the left you choose “FTP & SSH” > “FTP”.
- Click the three vertical dots next to your FTP user to view the login details. You see a server, port and user. Keep this handy for the next step.
Step 3: Connect to your hosting package via FTP
Do you have the FTP details of your hosting package? Open your FTP program and enter it to connect to your hosting package.
Your FTP program will request the following information (see image):
- Host : Enter your FTP server here. Eg ftp.domainname.com
- Username : Enter your FTP user’s username. Eg jonas@domainname.com
- Password : The password of your FTP user.
- Port : Enter the port that the control panel indicates.
![]()
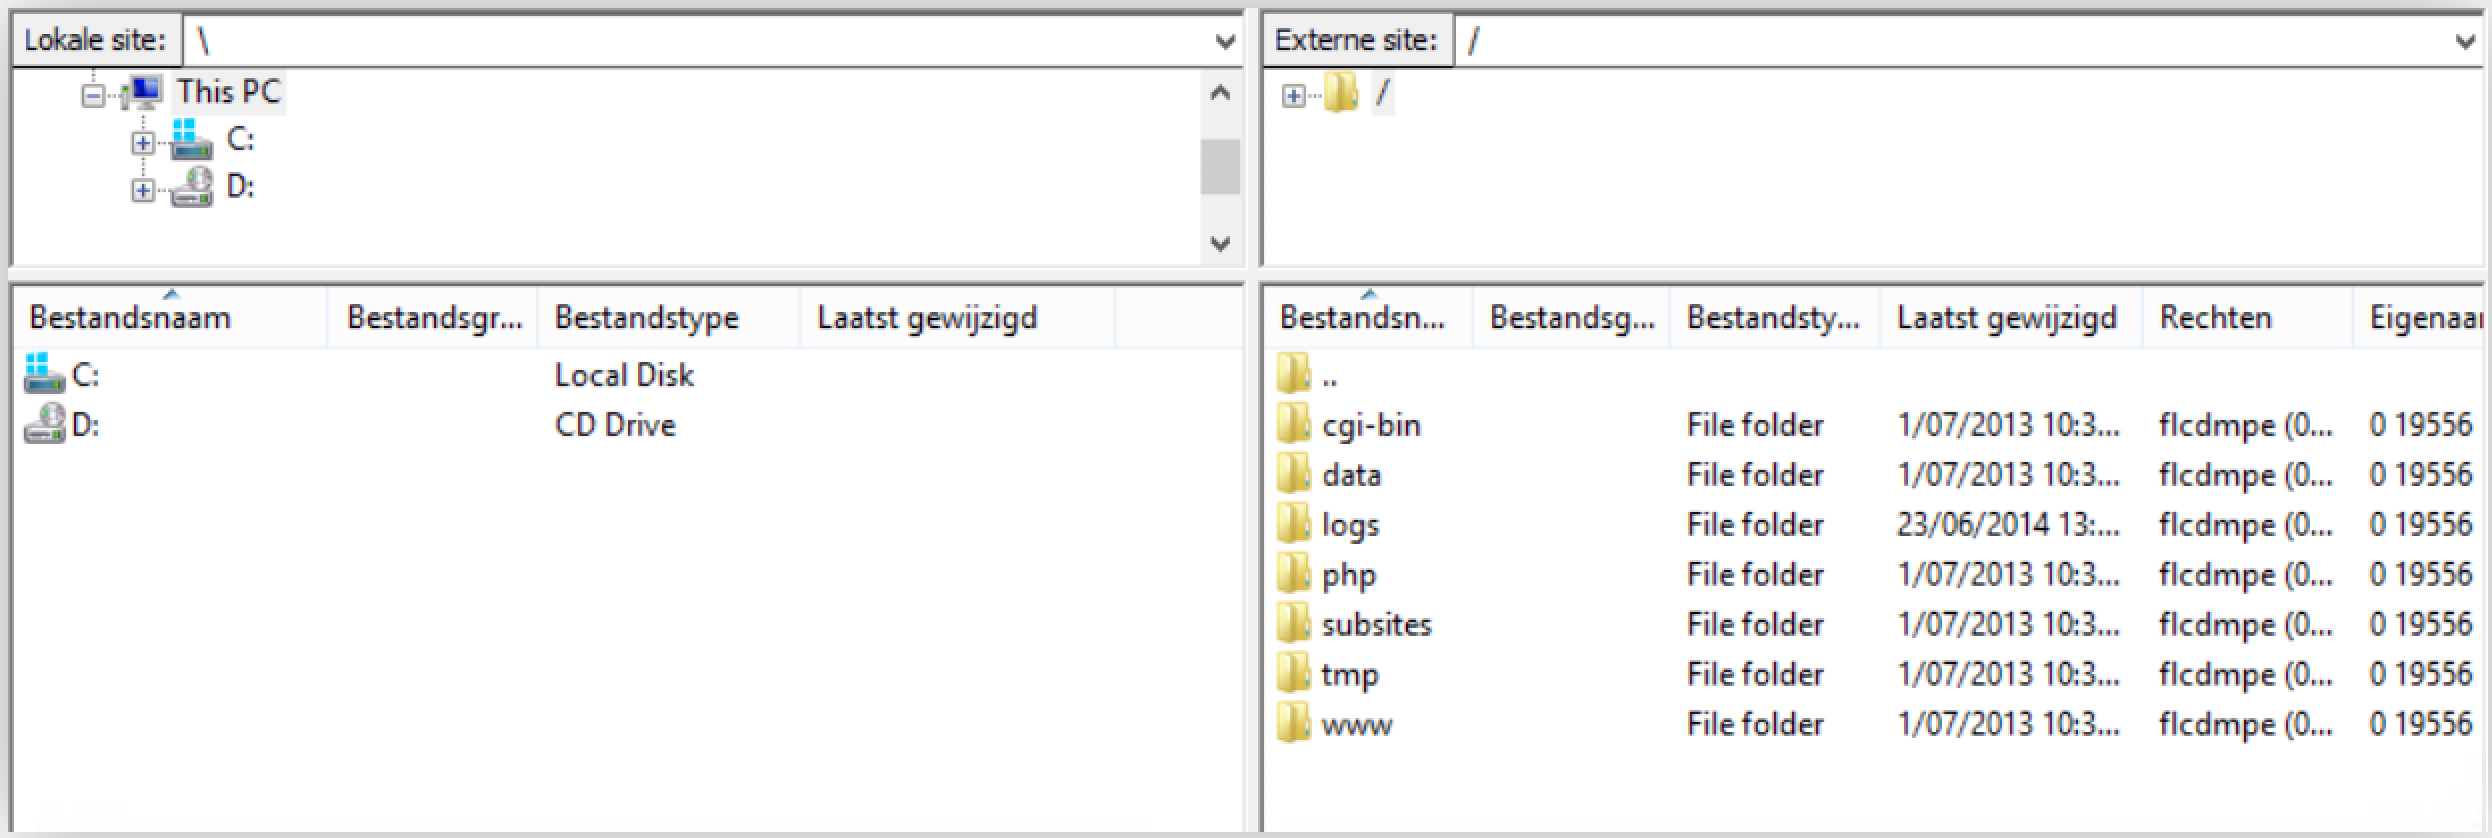
Step 4: Transfer your files via FTP
In your FTP program you have 2 panels (see image). On the one hand you see the files and folders on your own computer, on the other hand you see those on your web hosting package.
Follow these steps in your FTP program to put files on your hosting package:
-
, the public folder where your website must be uploaded is the “www” folder. Select this “www” folder on your web hosting account. Never delete the “www” folder!
- Select the folder or file with your website from the files on your computer and choose “upload“. With FileZilla you get this choice with a right click.
-
Your files will now be transferred from your computer to the public “www” folder on your web hosting account. Once the upload is complete, your website will appear on your domain name.
Can’t see your website yet?
Check whether your web hosting account is linked to a domain name.